How to Create a Sea World I Spy Worksheet
If you want to make a sea world I Spy worksheet, the fastest workflow is to build the puzzle layout in iSpy Creator, export it to PPTX, and then finish the themed design in PowerPoint.
The app handles the image packing, answer grid, and preview for you. Then PowerPoint is where you add the final title, borders, and branding.
Here is the finished worksheet we are creating in this article:
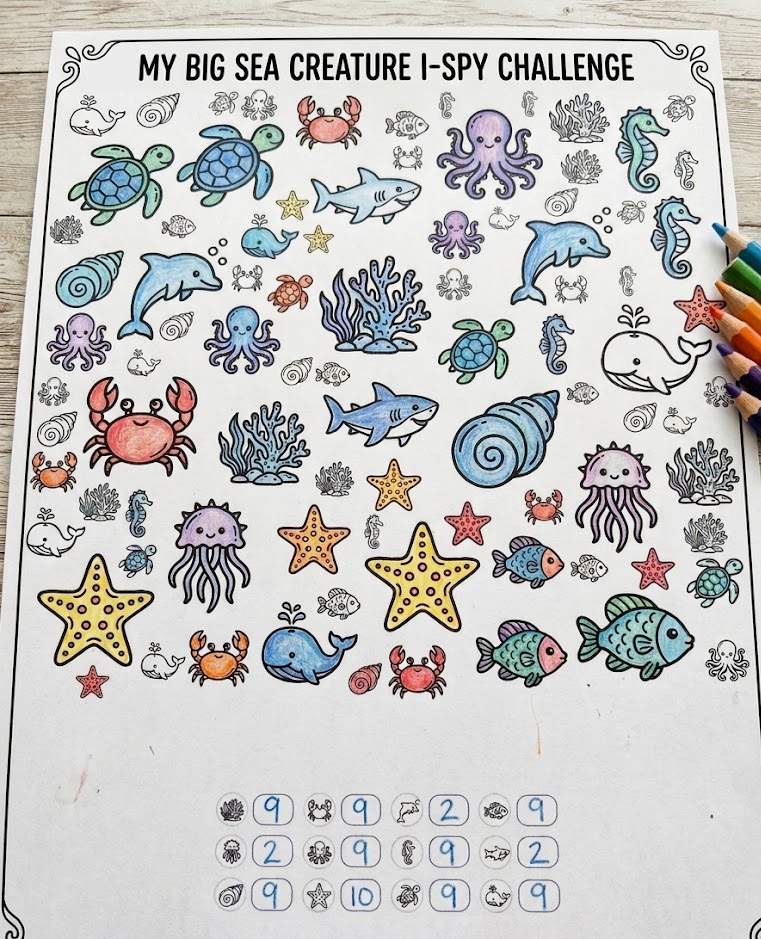
The completed worksheet, after exporting from iSpy Creator and adding the final design in PowerPoint.
Step 1: Upload your sea world images
Start in the Puzzle tab. Click Click or drag images here and upload the artwork you want to use in the worksheet.
In this example, I have used transparent PNGs.
After upload, you can:
- Leave the count on Auto to let the app fill the page
- Set a specific count if you want one image to appear more often, for example if you want a piece to be especially hard to find
The counts tell the app how many copies of an image to place in the puzzle. Auto means the app decides for you while filling the page. A fixed number reserves that many copies for that image — useful if you want some pieces to appear more (or less) often.
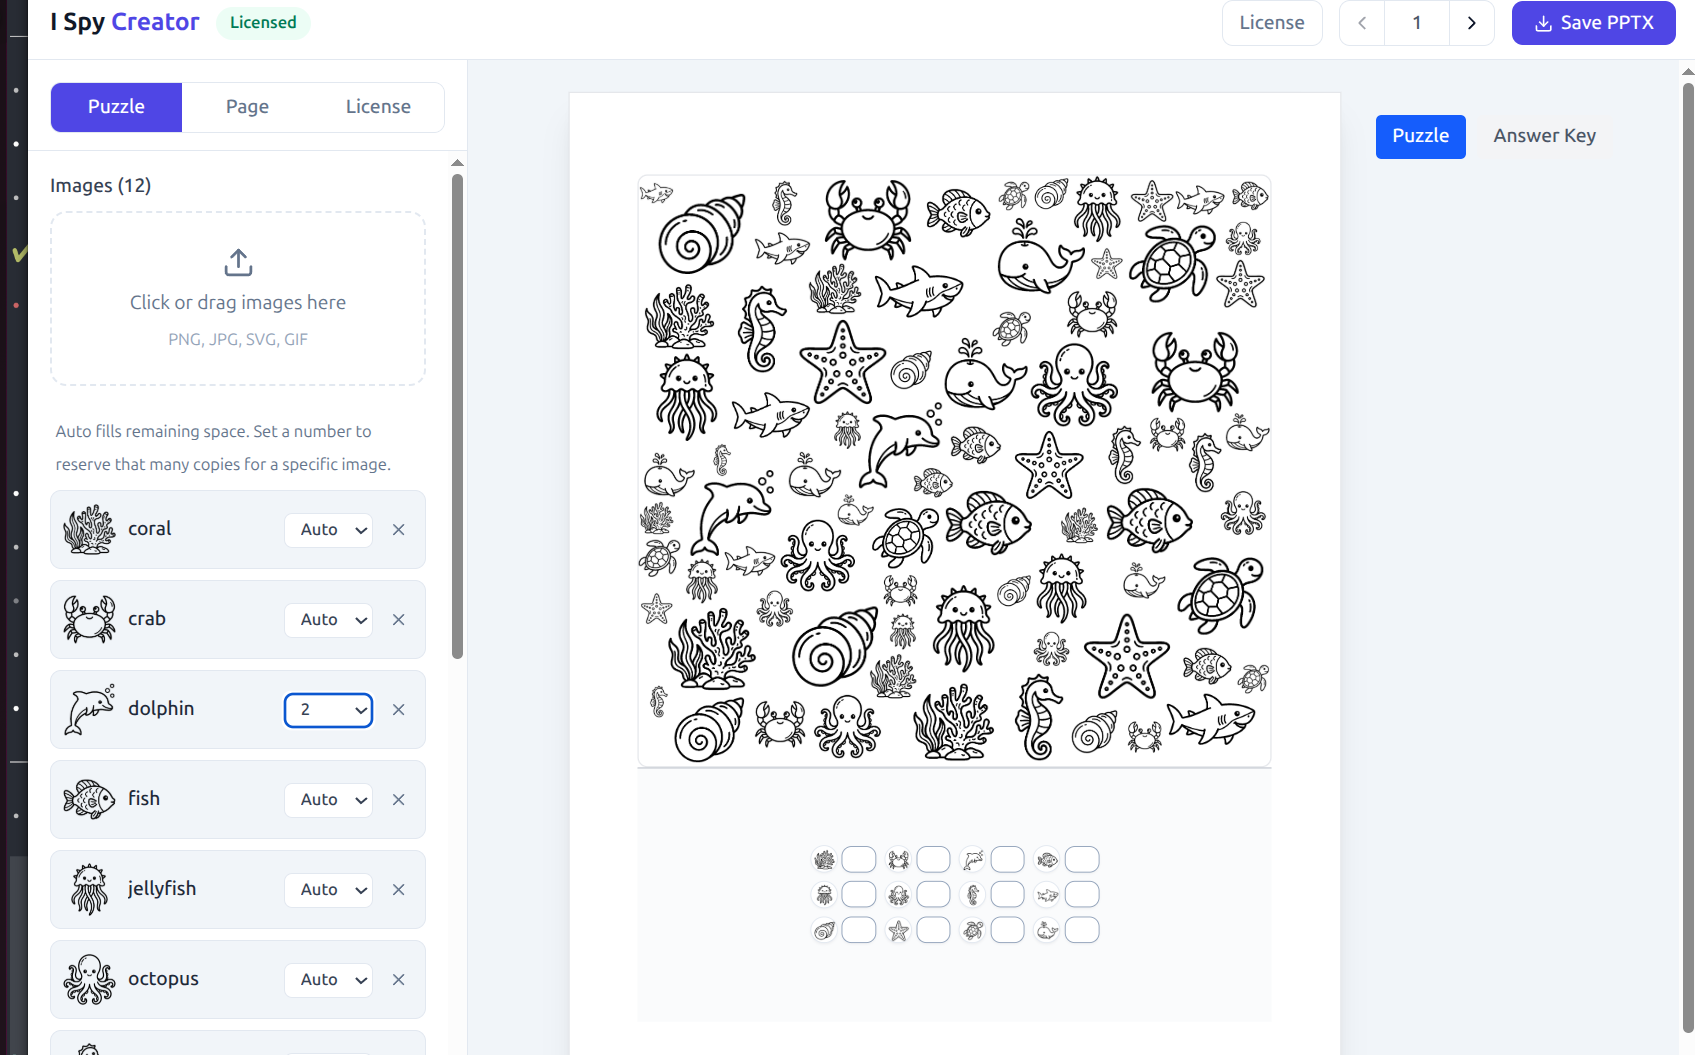
Upload your sea world images in the Puzzle tab, then use the live preview to check the layout and answer grid.
Step 2: Adjust the puzzle settings
Still in the Puzzle tab, adjust the layout controls:
- Piece Size controls how large the images appear
- Size Flexibility controls how much the image sizes can vary
- Rotate Pieces turns image rotation on or off
- Padding controls the spacing between images
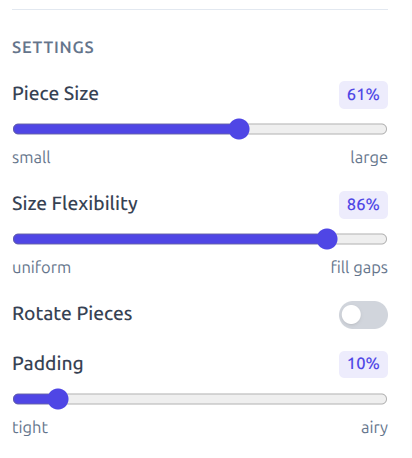
These controls change how tightly the images are packed and how varied the layout looks.
Step 3: Set up the worksheet page
Next, switch to the Page tab. This controls how the worksheet is arranged.
A good starting setup is:
- Page Size:
Letter - Orientation:
Portrait - Margins:
Normal - Turn Include Answer Grid on
- Choose Bottom Strip
- Choose Balanced
- Set Answer Grid Columns to
4
Then add your worksheet header:
- Enter a Title such as
Under the Sea I Spy - Add a short Subtitle if you want directions
- Turn Show Name & Date lines on if the worksheet is for classroom use
What these do:
- Include Answer Grid adds the count boxes below the puzzle
- Bottom Strip keeps the answer area under the main puzzle
- Balanced uses a
70 / 30split between puzzle and answer grid - Answer Grid Columns controls how many answer items sit on each row
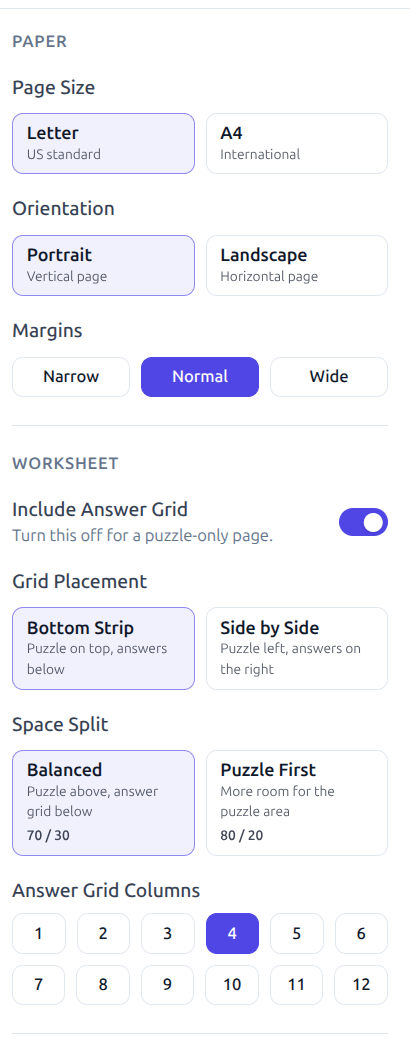
This layout keeps most of the page for the puzzle, while leaving enough room for the answer grid underneath.
Step 4: Check the preview
The preview updates automatically as you change settings. Use it to check:
- The page does not feel too crowded
- The images are easy to recognize
- The answer grid is readable
- The title and subtitle fit properly
If you want a different arrangement, use the Previous layout and Next layout buttons in the top bar to re-roll the layout until you get one you like.
If the worksheet includes an answer grid, use the Puzzle and Answer Key buttons under the preview to check both views.
The < and > buttons shuffle the page layout. The number in the middle shows which layout version you are viewing.
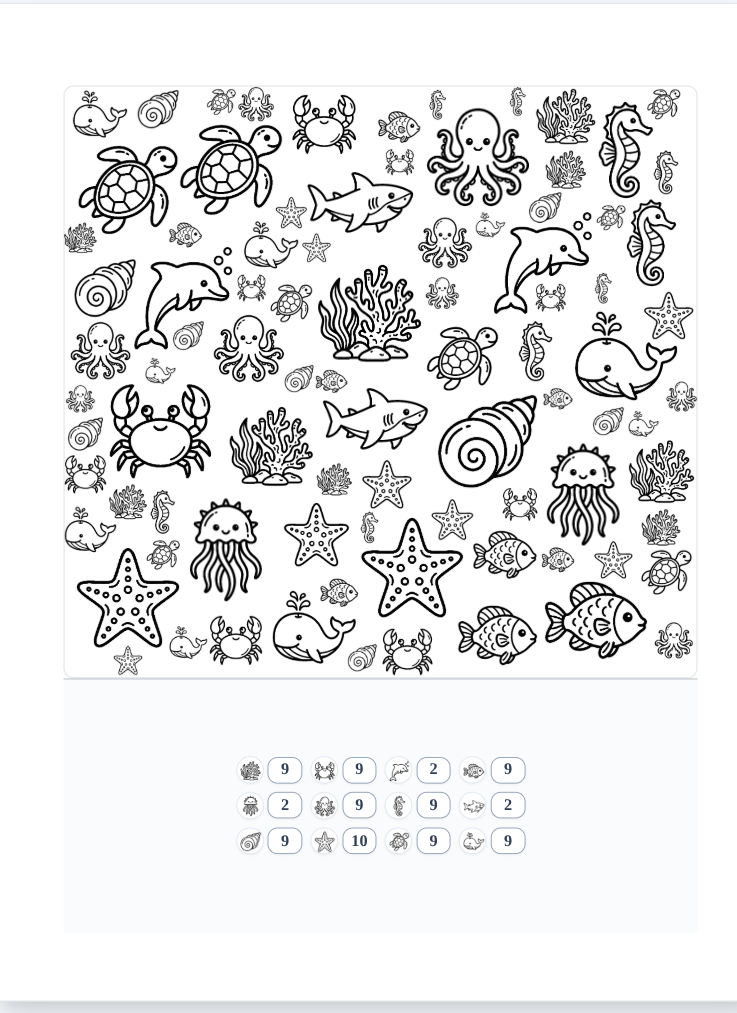
The finished preview: the packed image field on top and the answer grid below.
Use the arrows to shuffle the layout. Whatever is shown in the preview is what gets exported when you click Save PPTX.
Step 5: Export the worksheet
When the layout looks right, click Save PPTX. Whatever is currently in the preview is what gets exported to PowerPoint.
If you are still in demo mode, export will stay locked. In that case:
- Open the License tab
- Enter your license key
- Activate the app on that device
- Return to the editor
- Click Save PPTX
Step 6: Customize it in PowerPoint
Open the exported PPTX in PowerPoint and add the final sea world styling around the generated worksheet. Good things to add at this stage:
- A cover page
- Ocean-themed borders or bubbles
- Extra instructions
- Branding and page numbers
One tip: keep the puzzle area itself clear. The worksheet works best when the images stay easy to find and the answer grid stays readable.