How to Make a Color by Number Worksheet with Color by Code
Color by Code turns drawings into printable color-by-number worksheets. You give it a picture, it finds the shapes and codes them, and you get a student page plus a matching answer key. Here is what the final worksheet looks like printed.
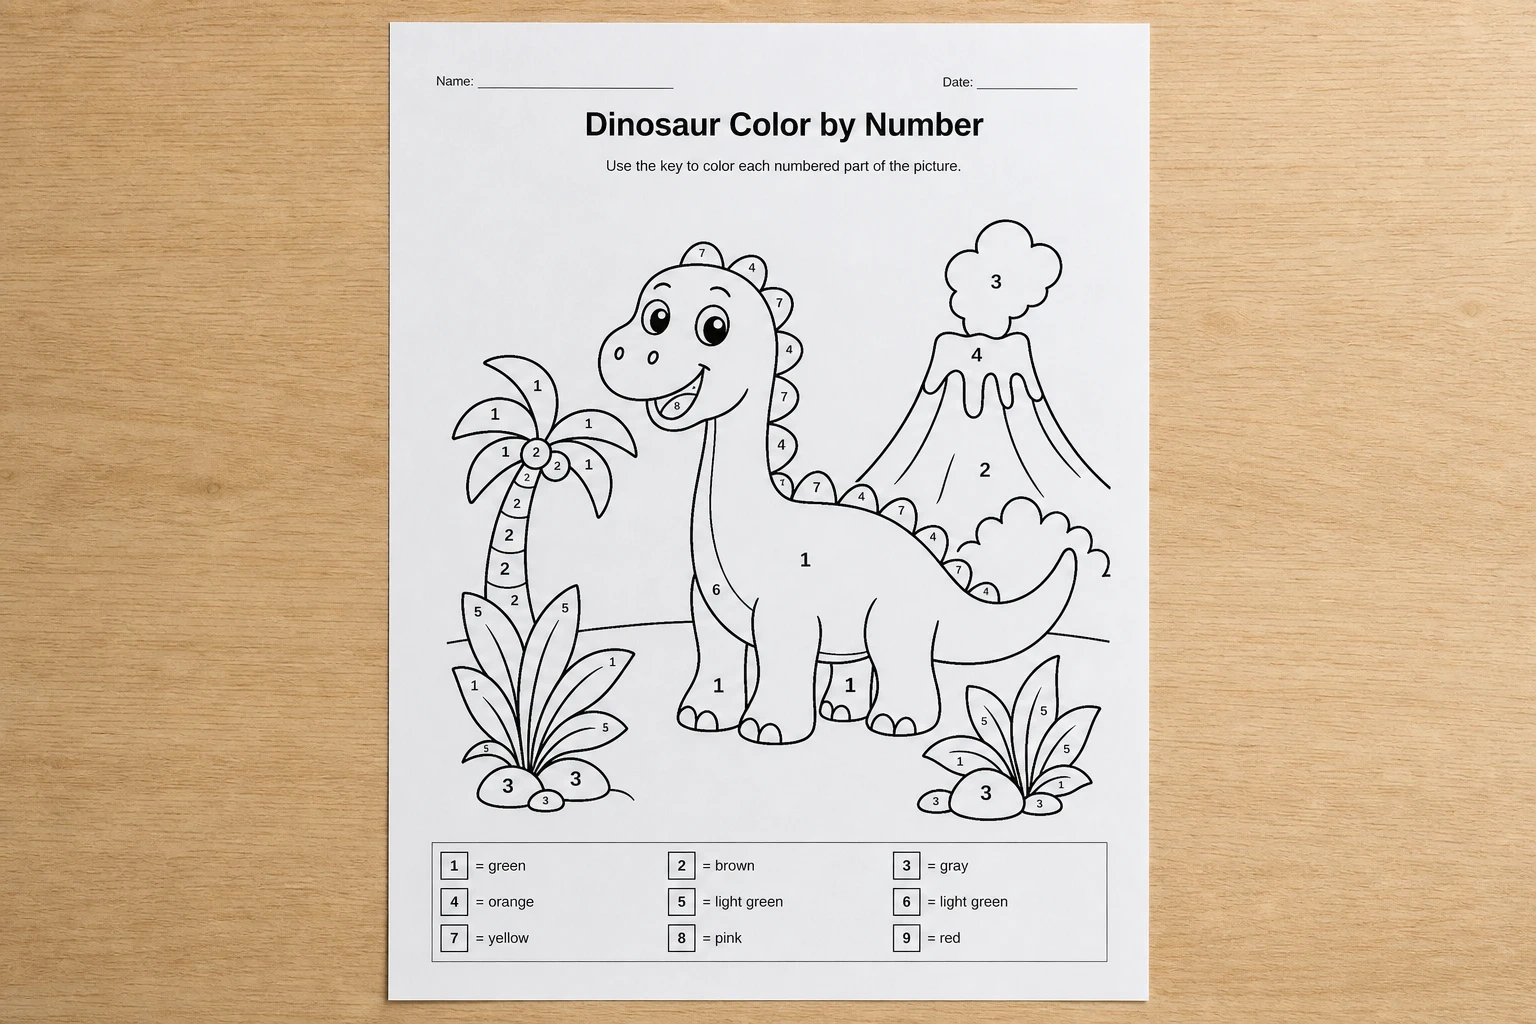
The finished worksheet, printed on paper.
There are two ways to feed the app a picture. You can upload plain line art and let the app pick a palette for you, then repaint any region by clicking a key color and then clicking the region. Or you can upload a version of the picture that is already colored in, and the app reads your colors and builds the key from them. This article follows the colored route, because the answer key then matches the artwork exactly. You can color the line art in any app you like, or start from artwork that is already colored.
The whole thing runs in your browser with nothing to install. The demo is free to build and preview with, and exports unlock once you drop in a license key from the product page.
Here is the starting line art, and the same picture after coloring.

The original black-and-white line art.

The same picture colored in. This is the file to upload.
Step 1: Upload
The app is a five step wizard: Upload, Regions, Color key, Page, Export. The first step is a drop zone that takes PNG or JPG.
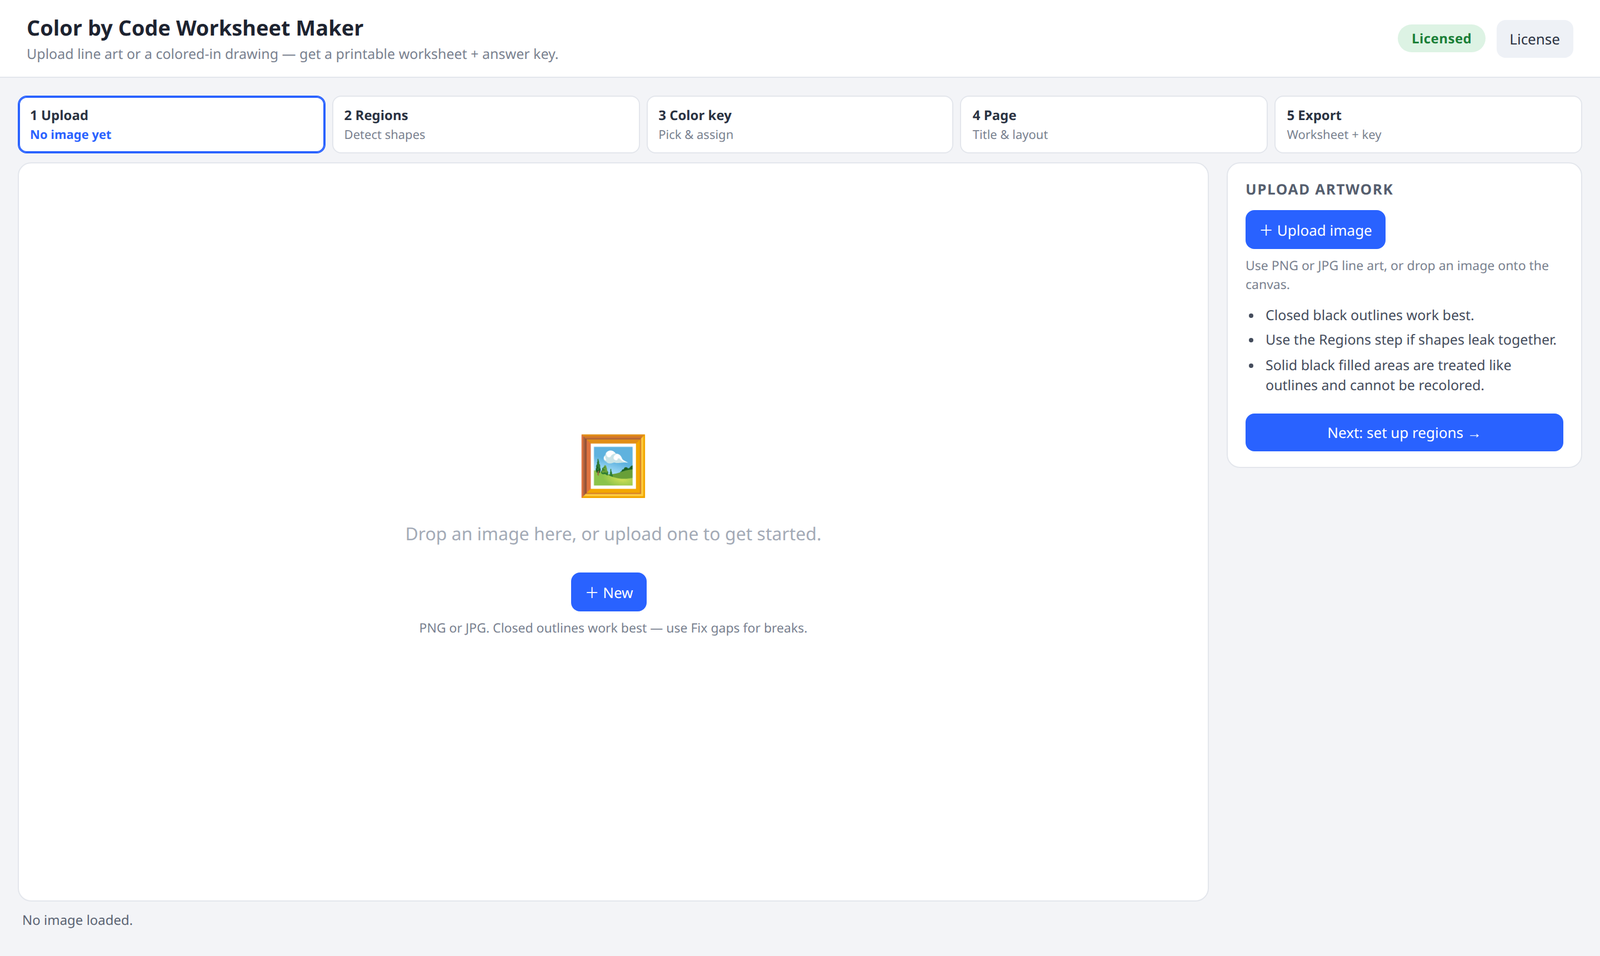
The starting screen, before anything is loaded.
A 1024 by 1024 colored dinosaur was dropped in. Detection runs on its own. The status read “53 coded regions (74 total), colored artwork detected.” It read the fill colors and built the key straight from the picture. The white background stays uncoded, so it never gets a number.
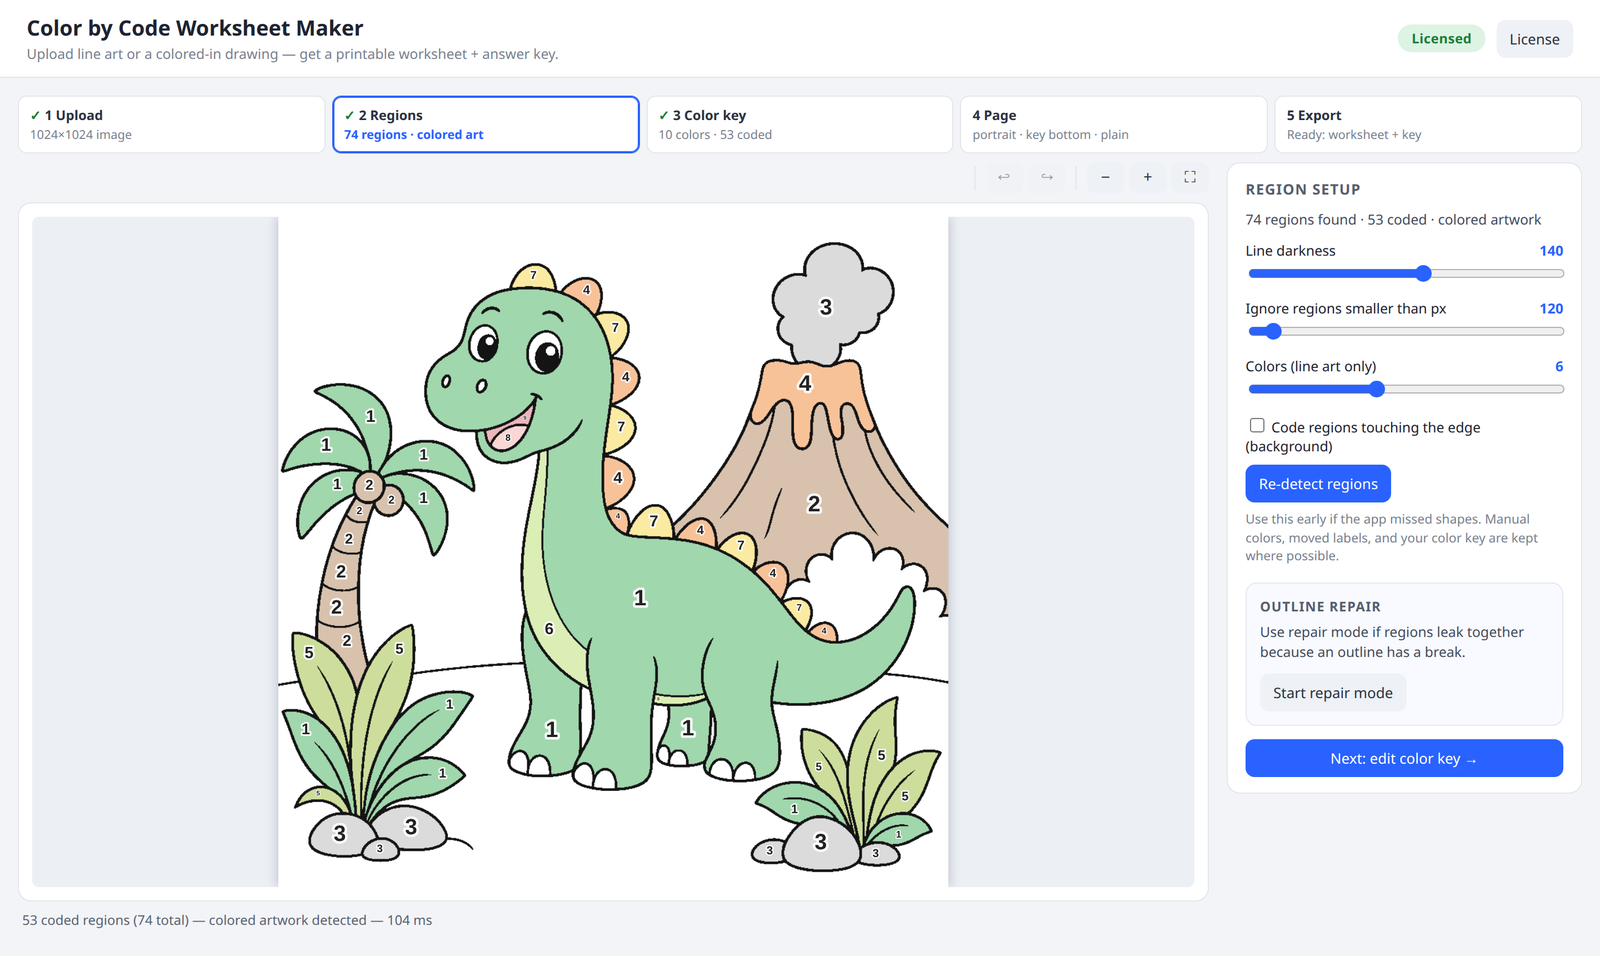
Right after upload. The key is built from the colors in the picture.
Step 2: Regions
The Regions step is where you tune detection. There are sliders for Line darkness, for ignoring regions smaller than a pixel size, and for the number of colors when you work from line art. A Re-detect button re-runs everything, and an Outline repair mode gives you a gap brush for artwork with broken outlines. One thing to watch: very dark fills like dark brown or dark green can be mistaken for outlines, so lighten them or drop the Line darkness slider and re-detect.
Step 3: Color key
The key came out with nine rows pulled from the image. Every code and name is an editable text field. The auto namer got two wrong, calling brown “gray” and gray “lavender,” so the right names were typed in. It had also grabbed a stray near-white color from the cloud, so that row was removed. A dropdown switches the codes from numbers to letters. There is also an advanced option for custom region codes, where one color can carry several codes like 5+5 and 6+4, which turns the picture into a math facts worksheet.
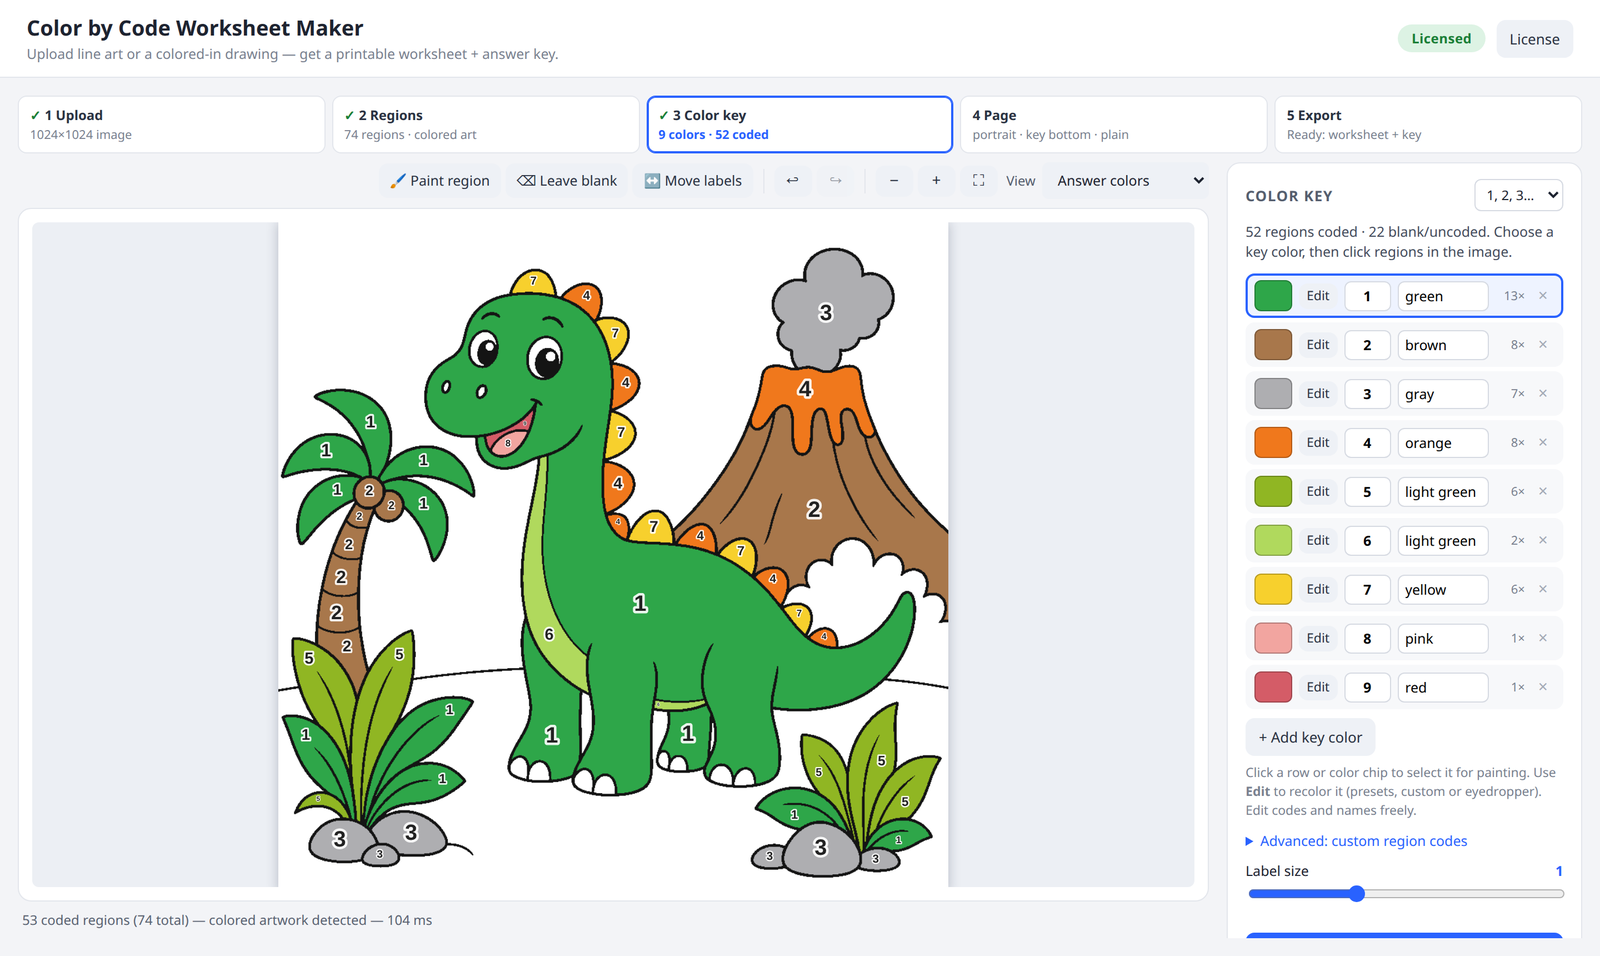
The Color key step, with names fixed and the stray color removed.
Step 4: Page
The Page step is the wording and layout. Type a title, such as “Dinosaur Color by Number,” and an instructions line. You can set portrait or landscape, put the key at the top, bottom, or hidden, and style the key boxes as Plain, Crayon, or Pencil. A live preview flips between the worksheet and the answer key.
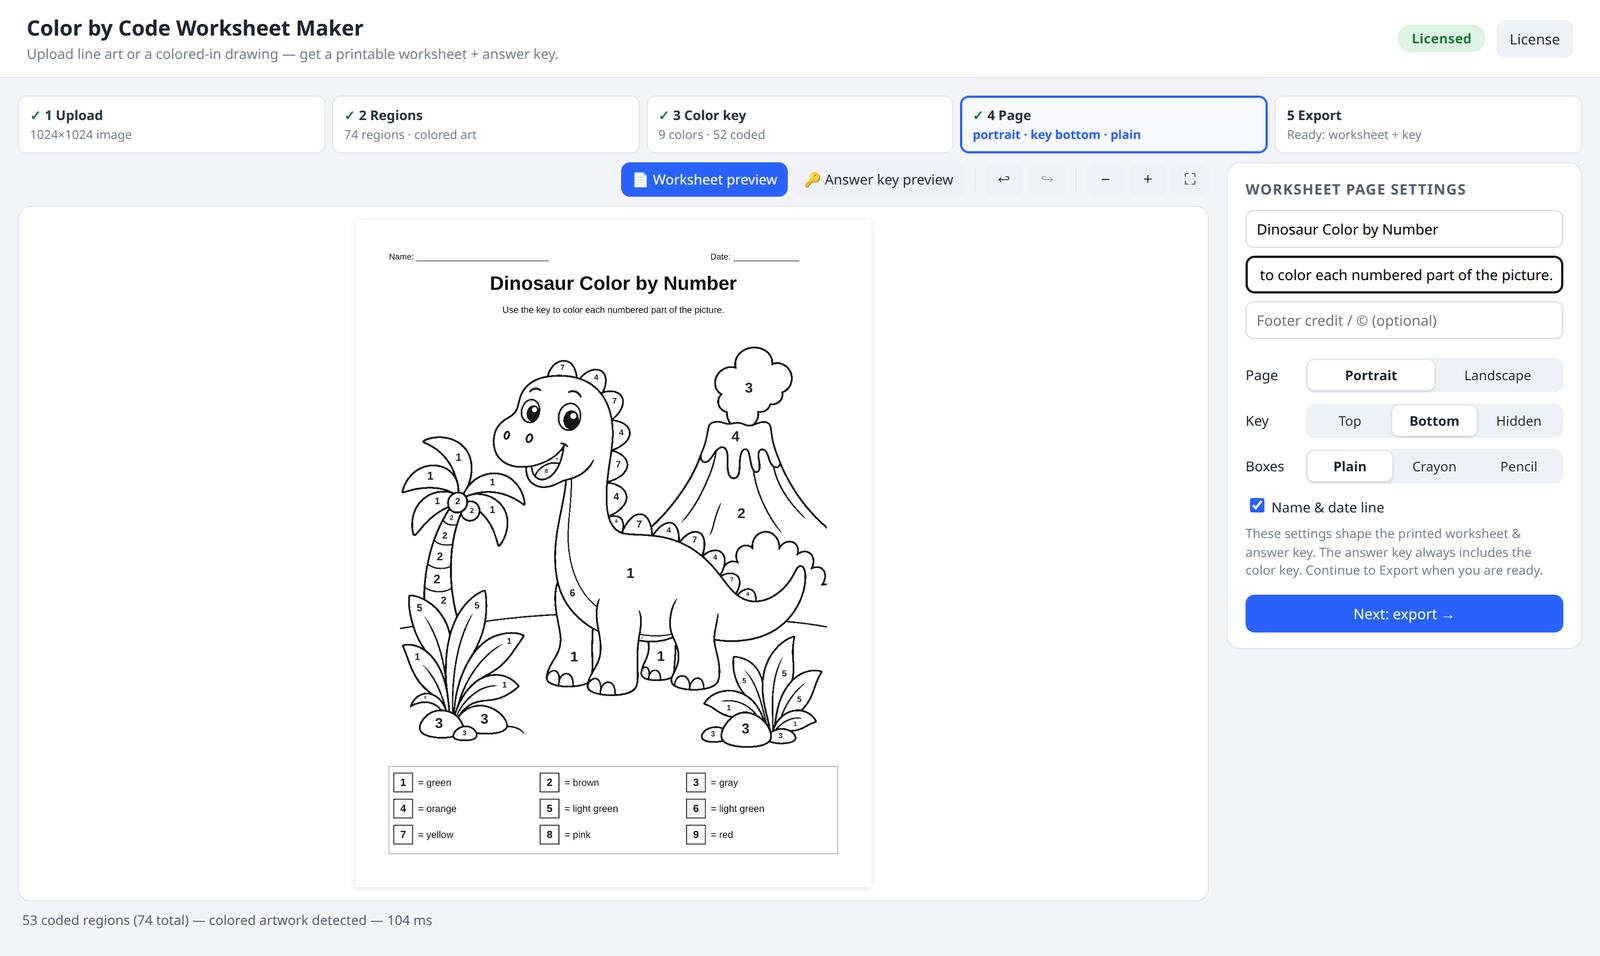
The Page step, with the title and instructions in place.
Step 5: Export
The last step has four buttons: PowerPoint, Worksheet PNG, Answer key PNG, and Print both. Files are named from the title, so this example came out as dinosaur-color-by-number-worksheet.png and dinosaur-color-by-number-answer-key.png.
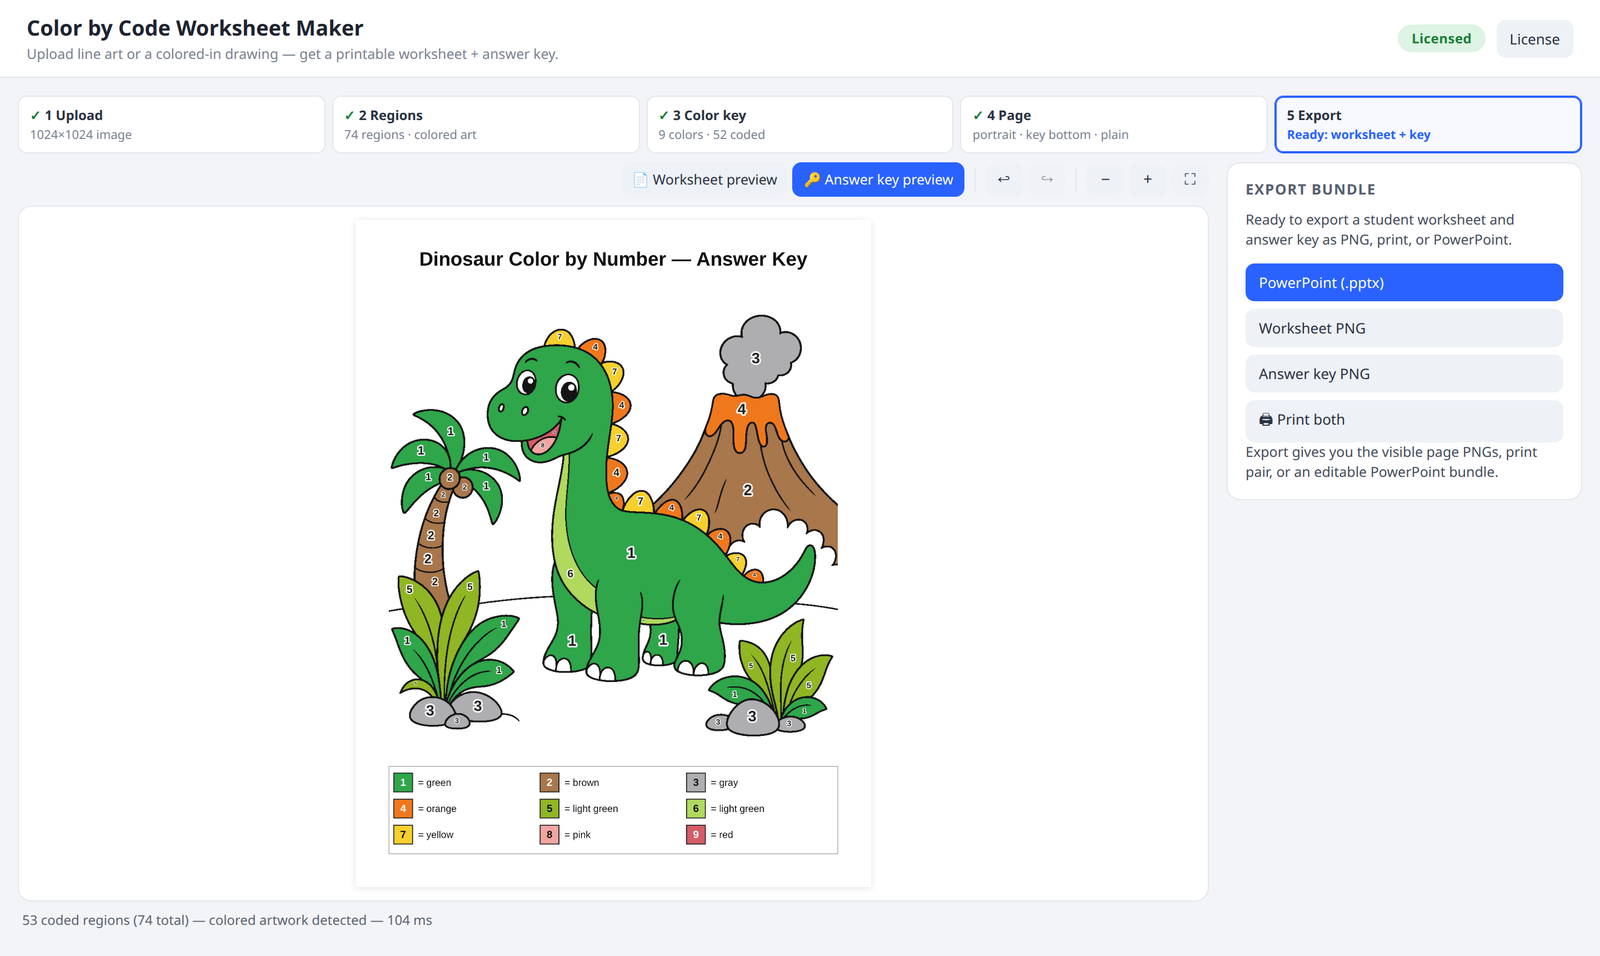
The Export step and its four buttons.
The student page has the Name and Date line, the title, the instructions, the numbered artwork, and the key box. The answer key is the same page fully colored.
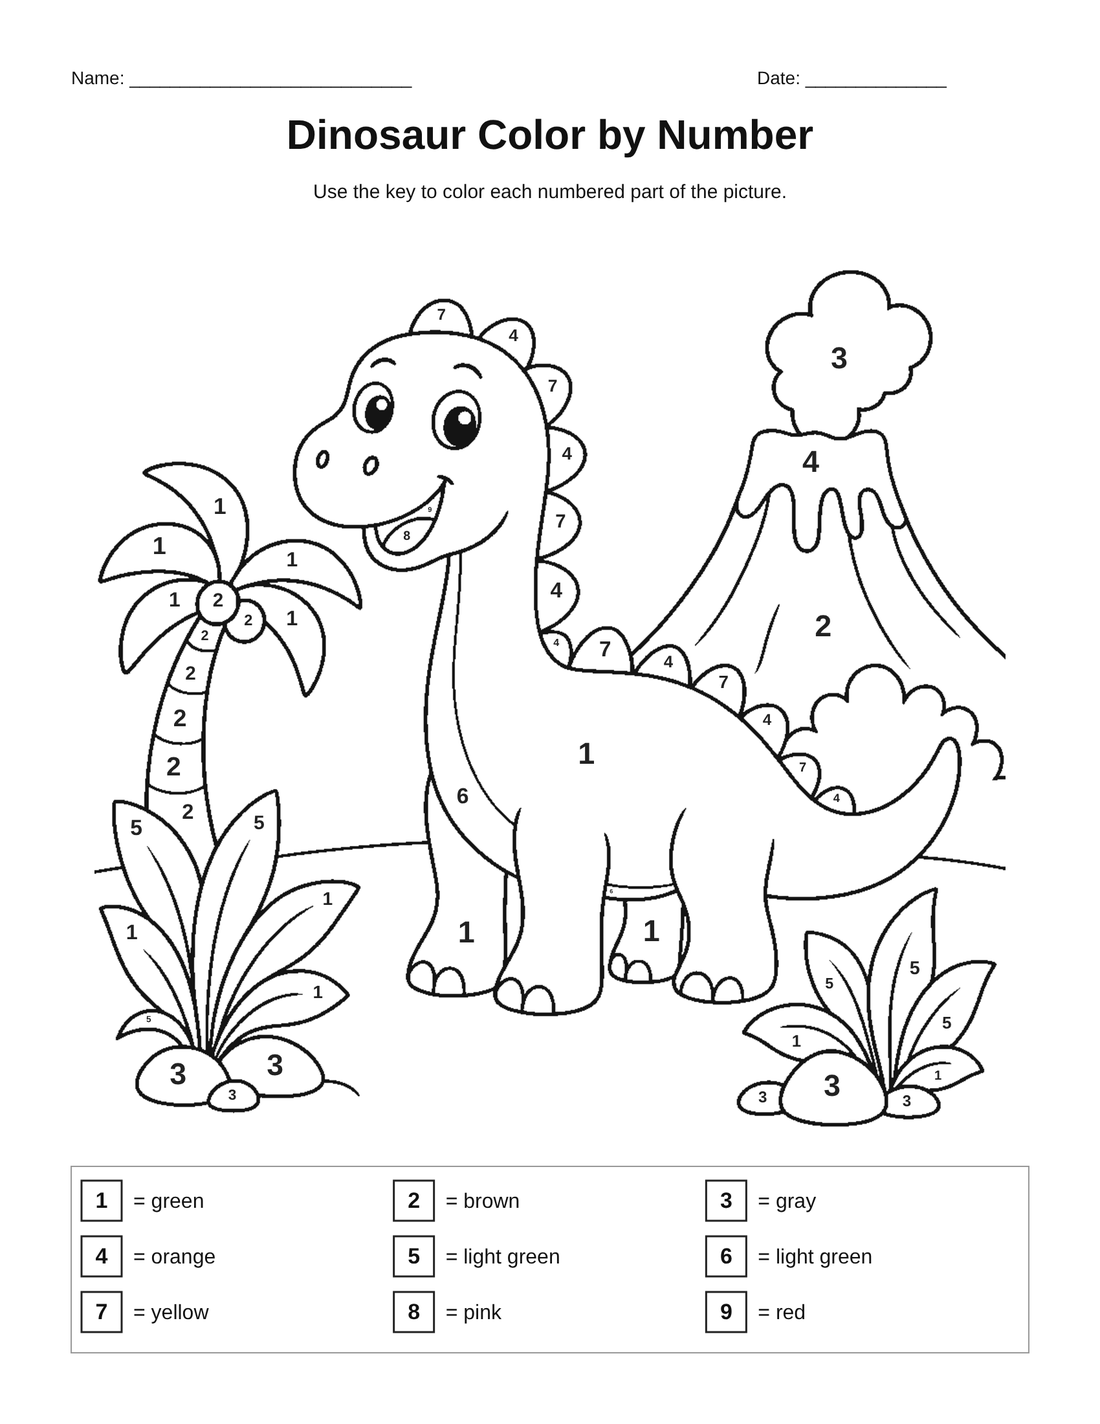
The student worksheet, ready to print.
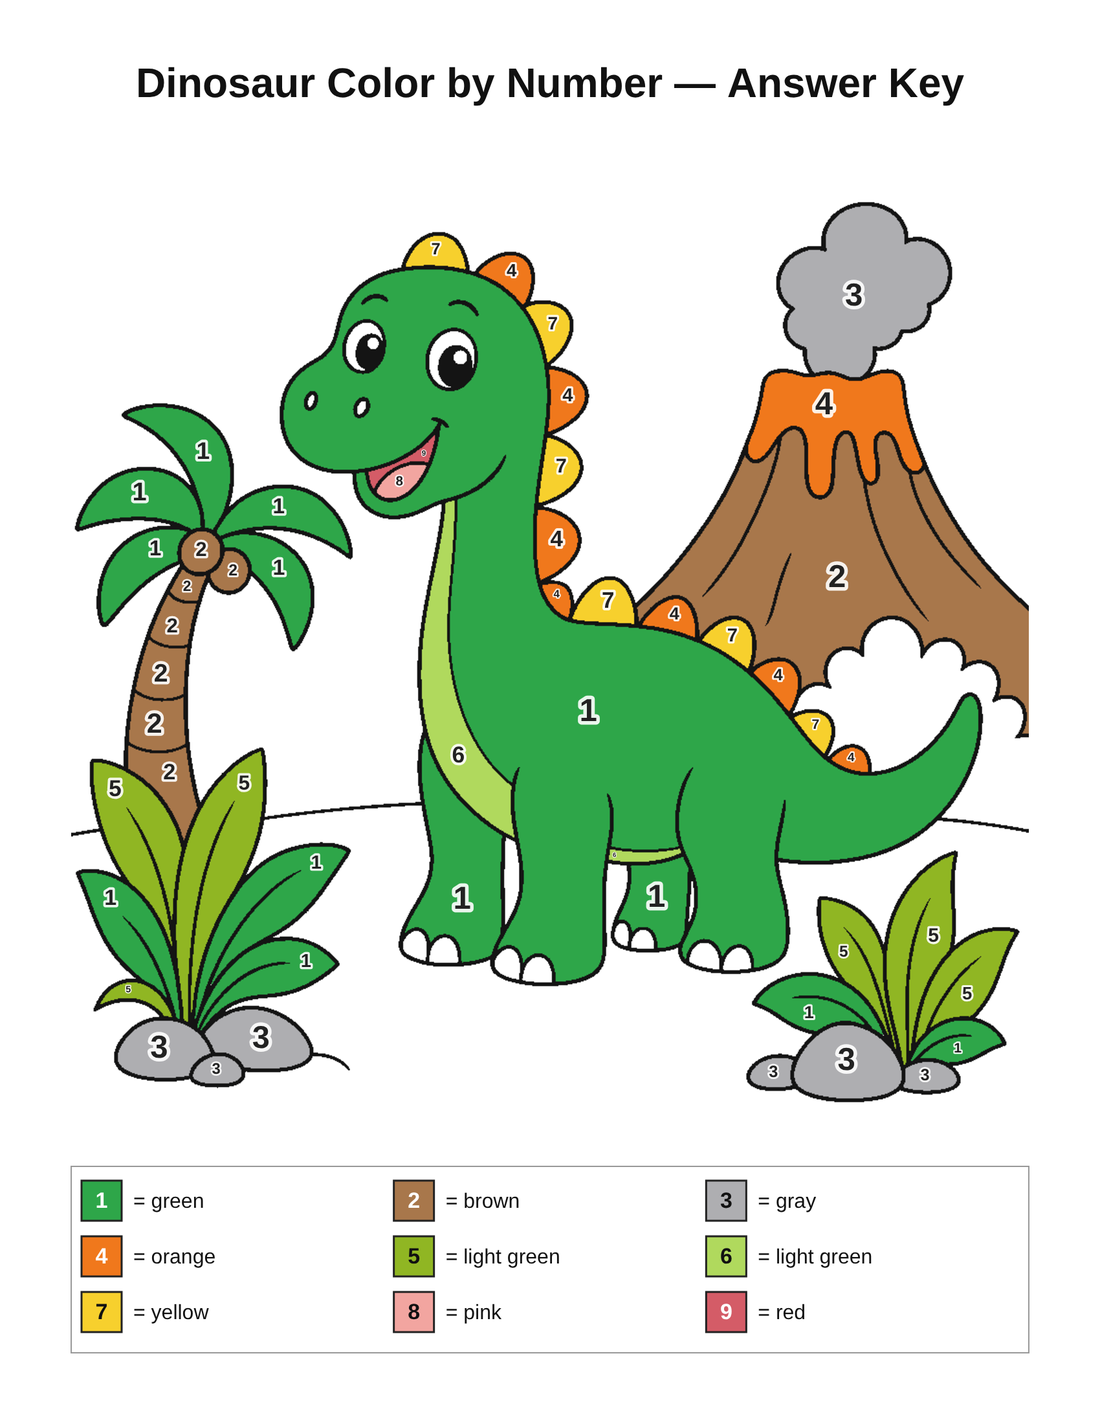
The matching answer key, fully colored.
Recap
- Color your line art, or start from artwork that is already colored.
- Upload it and let detection build the key from your colors.
- On the Regions step, tune the sliders or repair broken outlines if you need to.
- On the Color key step, fix any names, choose numbers or letters, and edit codes.
- Add a title and instructions on the Page step, then export as PNG, print, or PowerPoint.
Send an e-mail if you make something with this. It would be fun to see what you build.